
Every major battle, every winner, every method — the power dynamics of JJK changed here
|
Major Fights |
Secondary Fights |
Colonies |
|
6 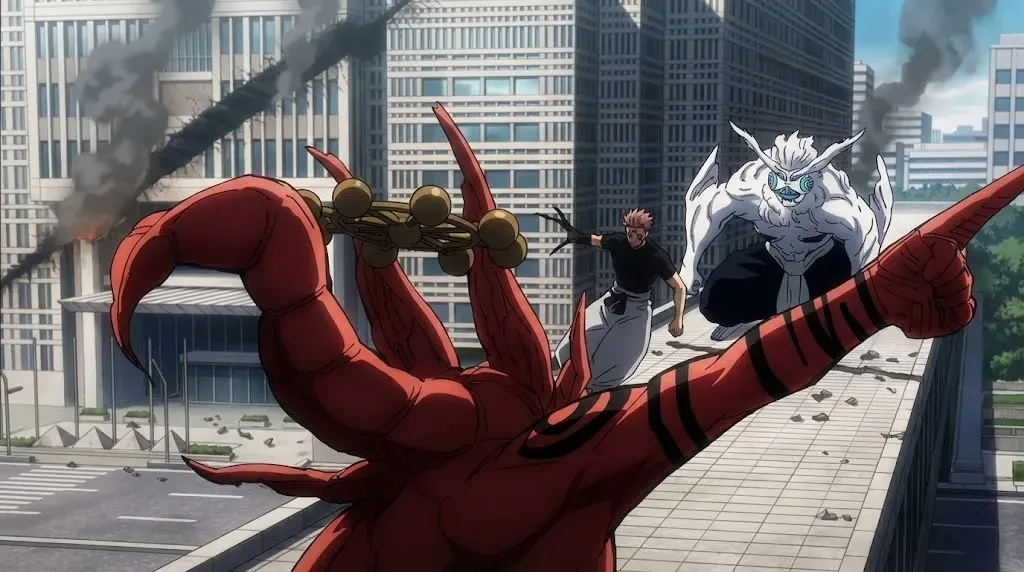 Also ReadSukuna's World-Cutting Slash Explained Also ReadSukuna's World-Cutting Slash Explained
|
3 |
10 |
 Also ReadThe Mahoraga Ritual Rules Explained
All Results at a Glance
|
Matchup |
Winner |
Winning Method |
|
Hakari vs. Kashimo |
Kinji Hakari |
Survived steam explosion via Binding Vow (sacrificed arm); Jackpot endurance |
|
Yuta vs. Ishigori vs. Uro |
Yuta Okkotsu |
Copied Uro's technique; redirected Ryu's Granite Blast back at him |
|
Maki vs. Cursed Naoya |
Maki Zenin |
Zero cursed energy = invisible to domain sure-hit; Toji-level enlightenment |
|
Megumi vs. Reggie Star |
Megumi Fushiguro |
Weight-bearing shadow trap; finished with Divine Dog: Totality |
|
Yuji vs. Higuruma |
Yuji Itadori |
Higuruma voluntarily surrendered after Yuji's honest confession of guilt |
|
Kenjaku vs. Yuki & Choso |
Kenjaku |
Survived Yuki's Black Hole sacrifice using Kaori's Anti-Gravity System |
Top Fights
Major Battles — Full Breakdown
1 Kinji Hakari VS Hajime Kashimo

The most physically grueling fight of the entire arc. Kashimo — one of the Culling Game's most fearsome awakened sorcerers — brought overwhelming lightning-based cursed technique output that would have eliminated most opponents in minutes. Against Hakari, it became an endurance war.
Multiple Jackpot cycles gave Hakari the infinite RCT regeneration to keep recovering from attacks that should have been fatal. The decisive moment came when Hakari forced the fight into the ocean, turning Kashimo's electricity against the environment. Faced with a steam explosion powerful enough to kill almost anyone, Hakari made a Binding Vow — voluntarily sacrificing his arm to boost his power output enough to survive.
The fight's conclusion is as much about Hakari's willingness to pay an irreversible cost as it is about his technique. He wins not by being stronger, but by being willing to endure more.
|
Colony |
Deciding Factor |
Hakari's Edge |
Result |
|
Tokyo Colony |
Binding Vow — sacrificed arm to survive steam explosion |
Multiple Jackpot cycles = sustained immortality window |
Hakari Wins |
2 Yuta Okkotsu VS Ryu Ishigori & Takako Uro

The Sendai Colony three-way is the clearest showcase of Yuta's terrifying ceiling as a sorcerer. He didn't just survive two elite opponents — he used them against each other.
The fight reached a deadlock between all three fighters, each cancelling out the others' advantages. Yuta's decisive move came through his Rika-powered copying ability: he captured Uro's technique mid-combat and immediately turned it against Ryu — redirecting Ryu's own Granite Blast back at its user. The technique that made Ryu nearly unstoppable became the instrument of his defeat, channeled through the opponent he was simultaneously fighting.
The victory established Yuta as the most adaptable fighter in the arc — someone who doesn't just match opponents, but finds ways to make opponents defeat themselves.
|
Category |
Details |
|
Colony |
Sendai Colony |
|
Winning Move |
Copied Uro's technique → redirected Ryu's Granite Blast |
|
Key Ability |
Rika-powered technique copying mid-battle |
|
Result |
✦ Yuta Wins |
3 Maki Zenin VS Cursed Spirit Naoya

This fight is not really about combat technique — it is about Maki's transformation as a character finally manifesting as a physical reality. After the Zenin Clan massacre and her complete severance from her former self, Maki achieved full enlightenment: zero cursed energy, Toji Fushiguro-level physical ability, and a body that operates entirely outside the cursed energy framework.
Naoya, now a cursed spirit with a Domain Expansion relying on a sure-hit tracking mechanism, met his hardest possible counter. A domain's sure-hit targets through cursed energy signatures. With zero cursed energy, Maki has no signature — she is effectively invisible to the domain's tracking. The sure-hit cannot hit what it cannot find.
What should have been Naoya's ultimate trump card became useless against the one type of opponent it was never designed to handle. Maki walked through the domain and finished the fight on her own terms.
|
Aspect |
Detail |
|
Maki's State |
Full Enlightenment — Toji-level, zero cursed energy |
|
Why Domain Failed |
Sure-hit tracks cursed energy — zero CE = invisible to it |
|
Significance |
Confirms Maki as a top-tier physical combatant post-transformation |
|
Result |
✦ Maki Wins |
4 Megumi Fushiguro VS Reggie Star

The Megumi vs. Reggie Star fight is the arc's purest showcase of tactical intelligence over raw power. Reggie is a veteran Culling Game player with significant experience and a technique built around calling in constructs through receipts — a highly flexible, unpredictable ability. Against a less strategic opponent, it would have been dominant.
Megumi methodically read Reggie's technique, identified its constraints, and engineered a trap inside a gymnasium specifically designed to exploit those constraints. The weight-bearing trap within his shadow domain created an environment where Reggie's ability couldn't function as intended. The finishing blow — Divine Dog: Totality — closed the fight with one of Megumi's most powerful shikigami unleashed at full output.
It is a victory built entirely on preparation and reading: Megumi understood Reggie's technique better than Reggie understood Megumi's by the time the fight concluded.
|
Category |
Detail |
|
Victor |
Megumi |
|
Location |
Gymnasium (Megumi's chosen terrain) |
|
Key Tactic |
Used a Weight-bearing shadow to trap Reggie in a confined area |
|
Finishing Move |
Divine Dog: Totality |
5 Yuji Itadori VS Hiromi Higuruma

The most emotionally complex fight in the entire arc — and the one most people remember for what was said rather than what was thrown. Technically, Higuruma had the clear combat advantage. His Deadly Sentencing domain had captured Yuji and was progressing toward a verdict. Yuji was not winning the fight.
Inside the domain, Yuji did something no other opponent had: he told the truth. When asked about his guilt regarding the Shibuya Incident, Yuji confessed honestly, taking full responsibility for everything that happened under Sukuna's influence. This was not a tactical calculation — it was the same moral directness that defines Yuji as a character.
Higuruma — a former defense attorney who became disillusioned with a justice system that routinely punished the innocent — heard in Yuji's confession the kind of genuine accountability he had never encountered in a courtroom. He voluntarily deactivated his technique and joined Yuji's cause. The fight's objective — gaining an ally — was achieved not by combat but by character.
|
Aspect |
Details |
|
Combat Winner |
Higuruma had the clear edge |
|
Decisive Moment |
Yuji's honest confession of guilt re: Shibuya |
|
Outcome |
Higuruma surrenders voluntarily → becomes an ally |
|
Result |
◈ De Facto Yuji |
6 Kenjaku VS Yuki Tsukumo & Choso

The most costly victory in the arc — a narrow win that required Kenjaku to overcome a final gambit that should have been unsurvivable. Yuki Tsukumo and Choso fought together to protect Tengen from Kenjaku's plans, and the fight was close enough that Yuki chose to end it with a sacrifice.
In her final move, Yuki turned her own body into a Black Hole — an absolute gravitational force that should have consumed everything in the vicinity, Kenjaku included. It was a devastating, irreversible sacrifice that left no room for conventional survival. Kenjaku found an unconventional one: using the ability of Kaori Itadori (one of the many techniques he carries from transplanted brains), he deployed the Anti-Gravity System to counteract the gravitational pull and escape the Black Hole's event horizon.
Kenjaku survives. Yuki does not. Tengen is not protected. The fight leaves the heaviest emotional weight of any in the arc — a hero-level sacrifice that succeeded only in buying time.
|
Element |
Description |
Outcome |
|
Yuki's Action |
Transformed herself into a Black Hole. |
Should have been lethal to Kenjaku. |
|
Kenjaku's Counter |
Used Kaori Itadori's Anti-Gravity System. |
Escaped the Black Hole's pull. |
|
Cost |
Yuki Tsukumo |
Deceased. |
|
Result |
Kenjaku |
Narrow Win. |
Secondary Fights More Culling Game Results
|
Battle |
Panda vs. Hajime Kashimo |
Takaba vs. Hazenoki |
Sukuna vs. Yorozu |
|
Outcome |
Kashimo Win |
Draw / Withdrawal |
Sukuna Win |
|
Summary |
Kashimo exhibited his overwhelming power by brutally destroying two of Panda's cores, leaving him in a weakened, "baby" state before moving on to his main objective. |
The fight concluded when Hazenoki chose to withdraw, realizing his explosives were ineffective against Takaba's reality-warping comedian technique. Neither fighter was decisively defeated. |
A technically brilliant victory for Sukuna, who used the Ten Shadows technique's Mahoraga to adapt to and ultimately shatter Yorozu's "Perfect Sphere"—a defense thought to be impervious to all attacks. |


// Comments